
Knowing the common mistakes people make when painting is crucial. At first, painting might look easy. Yet, we often hit snags due to not preparing enough or lacking knowledge. we’ll look at the big errors to dodge. This guide aims to help us steer clear of these errors, so our painting looks perfect and lasts a long time.
Introduction to Painting Projects
Starting painting projects is exciting but can also be a bit scary. We jump into DIY projects, hoping to make our spaces beautiful. But, without proper paint preparation, mistakes can happen, leaving us unhappy with what we’ve done.
Knowing the problems we might face is very important. Whether it’s a small room or a big area, getting ready is key. We need to pick the right tools and get surfaces ready. Every step matters to make it look awesome.
We can paint with more confidence if we know the common issues. Let’s enjoy our DIY paint jobs. With the right knowledge, we can overcome troubles and enjoy what we’ve created.
Understanding the Importance of Prep Work
Starting a painting project right means doing good prep work first. This prep work makes sure our painting goes smoothly and looks great for a long time. We need to focus on two key prep steps: cleaning surfaces well and keeping our furniture and floors safe.
Cleaning Surfaces Thoroughly
Cleaning is super important for paint to stick properly. Dirt stops paint from sticking well. We need to clean off any dirt or marks. You can use soap and water or a special cleaner for different surfaces. Here’s what to do:
- Wipe walls and trim with a damp cloth
- Take off any old, flaking paint
- Make sure everything is dry before you start painting
Protecting Furniture and Floors
It’s important to keep furniture safe when painting. Use cloths or plastic sheeting to protect stuff from paint drips. Cover all furniture and floors to prevent damage. Here’s how to protect your space:
- Put drop cloths down where you’re painting
- Move smaller items out of the room
- Wrap large pieces in plastic or old sheets
Doing these steps helps make sure our painting project turns out well. It helps avoid mistakes and gets our surfaces ready for a new coat of paint.
Choosing the Right Paint and Finish
Picking the right paint and finish can really improve our painting projects. Learning about different paint types and sheens helps us choose wisely for each room. We can pick colors that match the lighting and decor, creating a welcoming space that reflects our style.
Types of Paint Sheens for Different Spaces
The function and look are key when choosing a paint sheen. Different paint sheens have different uses:
- Flat: Best for rooms with less foot traffic, hides wall flaws.
- Eggshell: A bit tougher than flat, it’s good for living rooms and bedrooms.
- Satin: With a gentle shine, it’s ideal for busy areas like hallways.
- Semi-gloss: Its easy-to-clean nature fits kitchens and bathrooms well.
- Gloss: The shiniest choice, perfect for trim and cabinets.
Common Mistakes in Paint Color Selection
Choosing colors can be tricky. To dodge errors, remember:
- Check how colors change in different lights during the day.
- Make sure new colors match your current style.
- Try out paint samples on your wall before deciding.
Knowing about paint types and sheens, plus choosing colors wisely, leads to great results in our paint projects.
Ignoring the Need for Primer
Starting a painting project, we often skip using a primer. We think it saves time or money. But primer is key for paint to stick well.
Using a good primer makes surfaces smooth. It helps paint stick better. This leads to a professional look. Without primer, paint looks dull and uneven. The colors don’t pop as they should.
Changing from light to dark colors? A tinted primer really helps. It makes the topcoat work better and reduces the coats needed. Skipping primer can cause peeling paint or patchy spots. So, taking time to apply primer gives us great results to be proud of.
Utilizing Quality Painting Tools
Getting a perfect finish in painting projects requires quality tools. High-grade brushes and rollers lead to better outcomes. We’ll look into why top-notch tools matter and the downsides of cheap ones.
Benefits of Using Good Brushes and Rollers
Quality tools elevate our painting. They offer advantages like:
- Better Paint Coverage: They apply paint evenly, saving paint and ensuring a smooth appearance.
- Reduced Bristle Shedding: Top-tier brushes reduce shedding, keeping our work clean.
- Improved Control: They help paint precisely, especially in corners, without mess.
How Cheap Tools Can Ruin Your Finish
Low-cost tools, however, can spoil our work. The problems include:
- Uneven Application: Poor tools leave streaks, needing more touch-ups.
- Increased Frustration: They often need more paint refills, slowing us down.
- Shorter Lifespan: Quality tools last longer, while cheap ones quickly break.
Choosing the right painting tools is key to success. It ensures a smooth painting job. Let’s opt for the best brushes and rollers for that expert finish we aim for.
Common Painting Mistakes to Avoid
When starting our painting projects, we often face challenges. These can lead to common painting mistakes. Recognizing these errors helps us get a professional look.
Skipping the Second Coat
One big mistake is not applying the second coat of paint. This second layer is key for deep color and full coverage. Without it, the paint looks uneven and incomplete. So, applying that second coat makes our work look vibrant and even.
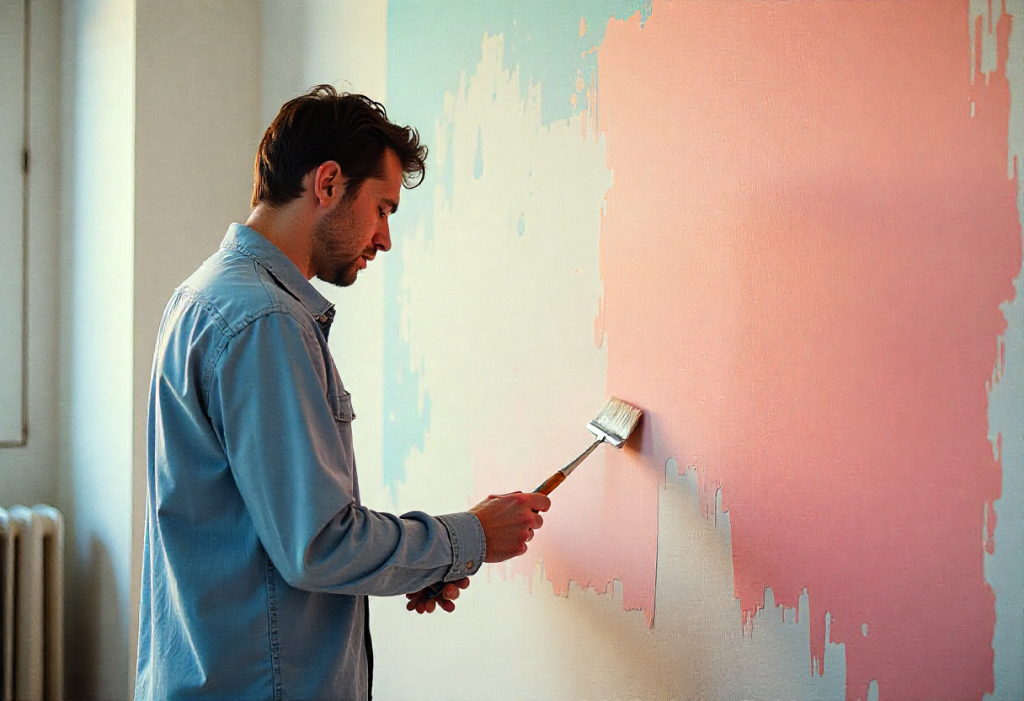
Using Incorrect Application Techniques
The way we apply paint really matters. Errors like overbrushing or uneven strokes cause noticeable marks and an uneven look. To dodge these mistakes, we should use steady movements and the right tools. Following the best application methods makes our painting look much better.
The Importance of Patience in Painting
When starting a painting job, how we do things really matters. Being patient is a big deal in painting. If we hurry, we might mess up our art’s look.
Waiting for Proper Drying Times
We need to wait the right amount of time between coats. Paint makers tell us how long to wait. If we don’t listen, the paint might peel or look bad.
Waiting helps our work look neat and professional.
Avoiding Overbrushing
Another thing to watch out for is overbrushing. Trying too hard to make it perfect can leave marks. We should paint lightly and not mess too much with it.
That way, our painting will be smooth and show off our skills.
Mastering Edge Work With Painter’s Tape
To get a professional look, neat lines are key. Painter’s tape is a top choice for this. It makes sure our edges are sharp, boosting the look of our work.
Putting on painter’s tape takes careful attention. We need the area clean and dry first. This helps the tape stick well and stops paint from seeping under. Make sure the tape is flat, with no air bubbles. This avoids any mistakes. Pressing down along the edges makes our lines even sharper.
After setting the tape, we’re ready to paint. Paint lightly along the tape’s edge for best results. We might want to remove the tape right after painting, but it’s better to wait a bit. This way, the paint won’t smear. Peel it off gently at a 45-degree angle to perfect our edges.
Knowing how to use painter’s tape can really up our painting game. With this skill, we can produce sleek, professional-looking lines that stand out.
Tips for Painting Techniques
Starting a painting project means you need to know how to paint well for a great look. A smooth finish makes any room look better. And, how you use your brush or roller really matters. Let’s see how you can get that perfect finish with the right moves.
Using Proper Motion for a Smooth Finish
For a look that seems done by a pro, it’s all about how you move the brush. The way you stroke and how hard you press can make or break the look. So, here are tips to remember:
- Consistent strokes: Keep a steady hand and make each stroke the same way. This avoids brush marks.
- Angle matters: Change the brush or roller angle based on what you’re painting. Different angles help with even paint.
- Pressure control: Don’t press too hard. A light touch gives an even coat for a smooth finish.
- Practice makes perfect: Try out different ways to see what’s best for you. Knowing your tools leads to better results.
Using the right moves when painting makes our work better and less flawed. A smooth finish is not just nice to look at. It shows how much effort and care we put into every detail.
Addressing Common Blunders in DIY Painting
When we try DIY painting, knowing common mistakes can make our work better. Many people get the amount of paint wrong or forget about the weather’s effects. Paying attention to these can improve our painting.
Measure to Avoid Running Out of Paint
Running out of paint is a big problem in DIY painting. It’s important to measure our painting area correctly. This helps us buy enough paint and avoid stopping in the middle.
Calculating the area we need to paint guides us in choosing the right amount. By planning carefully, our project will go smoothly.
Understanding Drying Times and Humidity Effects
Humidity affects how quickly paint dries. High humidity means paint dries slower, making us wait longer between coats. This is especially important for outdoor projects.
We should look at the weather forecast before we start painting. Knowing about humidity and drying times can prevent mistakes. With patience and this knowledge, our DIY painting can turn out great.
Tips for Successful DIY Painting
Starting a painting project is thrilling but can feel vast. To make our paint job great, we need good DIY painting tips. It’s important to plan well. We should figure out what parts need painting and what colors are best.
Choosing top-notch materials really helps. By investing in the best paints and brushes, we can make our work shine. Picking the right brushes and rollers for our paint kind is crucial. It makes a big impact on how things look in the end.
It’s key to let paint dry well between coats. This patience gives us a neater look and sticks better. We should also not hurry when painting. Applying paint carefully and evenly makes a big difference.
By following these DIY painting tips, we’ll be ready for any project. Good planning, the right tools, and patience can make any room look amazing.
Hiring a Professional Painter
Deciding on a painting project can be tough. Should we do it ourselves or get help? Many things can sway our decision. Hiring a pro brings big pluses, especially if we’re short on time, skill, or the right tools. For a top-notch look, going pro is key.
Benefits of Professional Assistance
Hiring a pro means accessing deep know-how and abilities. Pros know all about choosing colors that match our dreams. They’re great at prepping surfaces for a smooth finish, a step DIY folks often miss. And, they use the best materials for lasting results.
When to Consider Hiring an Expert
There are times when hiring a pro makes sense. If we’re super busy, the time they save us is a big deal. For tricky jobs, like fancy designs or tall ceilings, their skill leads to better looks. Going with a pro not only means a gorgeous outcome but also peace of mind, knowing the job’s done right.
Conclusion
As we conclude our talk on painting projects, it’s key to skip common errors that can mess up our work. Things like doing the right prep and choosing the right paint and tools matter a lot. Every little step helps in making our painting project a win.
Going through this article, we’ve learned how to better our painting skills and avoid mistakes. Using these tips can make our skills better. And help us make spaces that really show who we are.
Now, let’s take what we’ve learned and start our next painting project with a positive attitude. By doing this, every stroke of our brush will bring us closer to success. And give us a sense of pride in our work.
FAQ
What are the most common painting mistakes to avoid?
Avoid skipping prep work, not using primer, adding too much paint, and not waiting long enough between coats.
Why is prep work so important before starting a paint project?
Prep work is key. It includes cleaning surfaces and shielding furniture and floors. This helps the paint stick better and reduces flaws, resulting in a finer finish.
How do I choose the right paint finish for my project?
Different finishes have different uses. For hiding imperfections, flat works well. Semi-gloss is good for kitchens and bathrooms because it handles moisture better. Think about your room and decor before picking a finish.
What role does primer play in painting?
Primer creates a smooth base, improving paint adherence and color portrayal. Skipping it can cause uneven coverage and peeling.
How can I ensure a smooth finish when painting?
For a smooth finish, use quality brushes and rollers. Apply paint evenly, without overbrushing. Also, follow the right technique to avoid drips and streaks.
Why is it necessary to wait between paint coats?
Letting the first coat dry completely before adding another is essential. If you rush, it may peel or show flaws, affecting the look.
What is the best way to use painter’s tape?
Put painter’s tape straight along edges to stop paint from bleeding. Remove the tape once the paint dries for sharp lines.
What should I do if I run out of paint mid-project?
Measure your space and figure out how much paint you need first to prevent running out. If you do run out, use the same paint type and color for any needed touch-ups.
When should I consider hiring a professional painter?
If you lack time, experience, or want a perfect look, consider a pro. They know about colors, surface prep, and use the best tools.
How can humidity affect my painting project?
Humidity can slow down drying, especially outside. Check the weather before you start. Adjust your painting schedule to make sure your project turns out well.